you'll note that in the last three weeks, i have written exactly ONE blog post, and that one i had been writing as we worked along on the project ... a record of blog inattention, even compared to my 'bloggavacation' i took a year or so ago ... mr. dylan asks: what is going on here? i don't know, but, well, let me tell you, it's all good. as you can see from the list above, we have (now) 12 committed projects, (13; one just came in by email) including two 54 x 85 x 26" deep recycled chestnut cabinets, a ten foot table, a 17' table, another dining table, six chairs and a coffee table ... lots of stuff. but, on the right, you'll notice in the in process column 21 other proposals we're working on, most of which, as of right now, are out in the ether, awaiting replies or commitments. the photo below was taken around 11:00 this morning, just before i started scanning and emailing ... just finished it all up a minute ago ... i'm going to write this and then go have a couple of tall cold ones ... click the photos to enlarge them ...

a few new models ... a 30 x 60 dining table with a steel base; a 60" dining table with two leaves and a stainless base; and a little mockup for a 9'8" table with a rebar and steel base ... with that project there is also a 42" x 17' table ....

an assortment of proposals, ready to go ...

next up, the two
recycled chestnut cabinets mocked up with photoshop

along with those cabinets goes this 48 x 72" recycled chestnut pedestal dining table we finished last week ...

with 3 15" leaves ... better top color in this photo ... love, love, love my red walls, but they can really change the color of things ...

this 38 x 62 mahogany table with a steel shaker base left last week for california ...

bottom view with the actual mahogany color

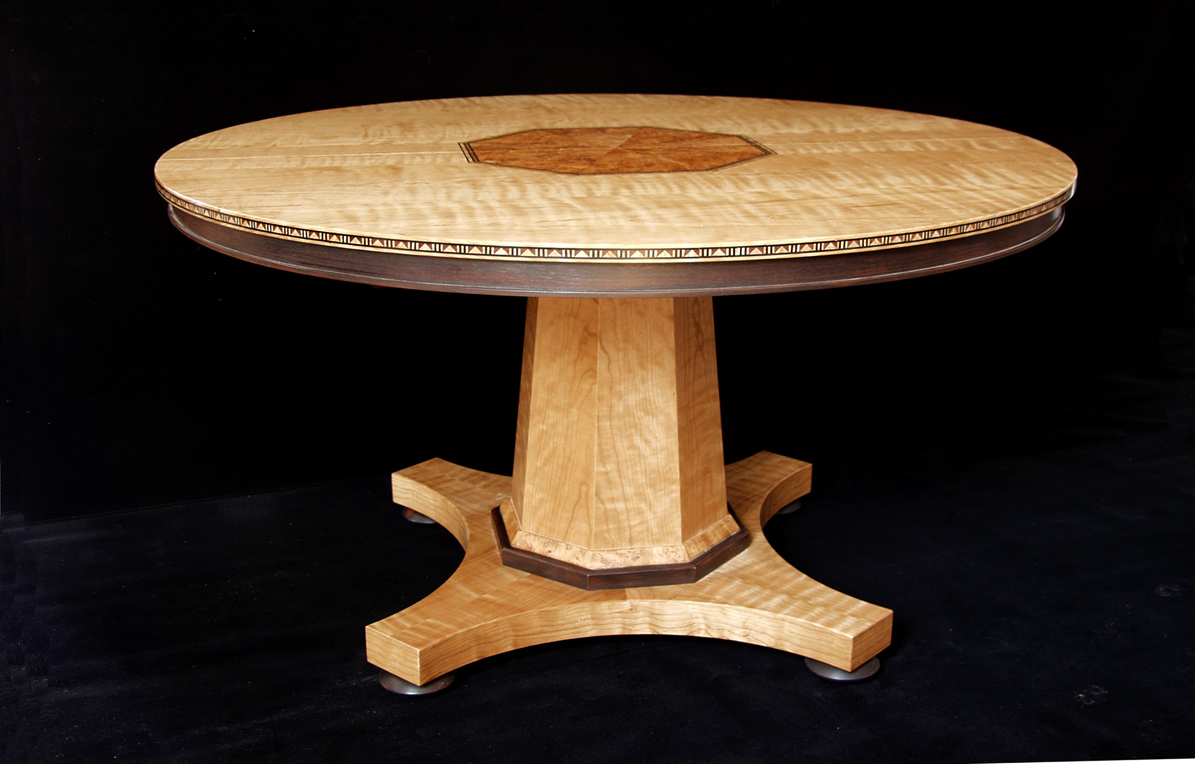
and now we're working on a version of
this table we made in 2002,

the main difference in the new design is the shape of the pedestal, which the client took from
our walnut and leather poker table ....

and will had to refigure out how to make the edge inlay blanks ... burl, bubinga and end grain peruvian walnut .. he wasn't here yet for the last time around and i couldn't exactly remember how to do it ...

here's how it looked at the end of the day today ... the edge inlay is all in and trevor will glue the burl center inlays in tomorrow in the vacuum bag ... a little clean up, some aprons and the runners and we'll wrap this one up ... i am planning a post on the whole table process, but certainly, not now ...

close up of the center inlay fitting

next ... this is the model for the 30" x 9' 8" elm table with the rebar base, made from an architects sketch ...

the client was concerned that the welded rebar base might need some other support, but sam convinced me that that would be totally unnecessary ... just as a fun test, we took the unglued rubber wood 1/8th " dowel model and loaded it, and put a little side sway weight on it ... no problem ... i imagine the welded steel base will be fine ...

to select the elm slabs for the table tops, i took a little trip to
berkshire products in sheffield, mass last week ... if you haven't been there or checked their website, it's a fantastic wood resource with a great photo website.

bought this one for the single table,

these two for the 17' table ... they will join in the center around an existing brick 30 x 30 column ...

bought a little burl for the cherry table we're working on too .. lots to choose from

big leaf maple from the west coast ...

the black and steel 60" table with the stainless base and two leaves ...

and we have a couple serious nibbles on the
big claro walnut slab on the wall in the finish room. in this drawing, it will become a 9' x 50" coffee table in aspen.

and lastly in the new model department, we have this maple and steel dining table with a clever adaptation by the clients of our 'shaker' steel base ...

and finally will got his banjo pot turning aparatus for
seeders instruments rigged up and it works really slick. it a combination of wood and metalworking tools that, with a little help from some online googling and some parts from grizzly and mcmaster carr, he adapted the whole works to suit his process. this is the inside of the pot turning set up ...

and, to turn the outside, you flip over the tool holder and angle the base plate. he's got two more parts to turn for some banjo orders, so he is really happy that it worked as well as it did.
all for now ... thanks for sticking with me. gold star for you if you made it all the way through. turns out i had to have the tall cold ones before i finished ... have a great weekend.
 this was fun ..
 usually i paint my woodburnings, but it takes a long time, and then i might have had to bid on my own ...
 tools of the 'trade'
 one of my painted efforts. i've always meant to incorporate this technique into my furniture .. maybe soon ...