
 what is a desk? really? a personal space. a place to write. a place to keep stuff. a place to work. a place to contemplate ... a desk is all of those things and they come in many forms ... this one i designed with a client back in oh, december? has it been that long? i can see by the date on the drawing below that we were at least talking about it then .. i don't think we finalized things until january sometime, about the same time that a bunch of other projects rolled in. anyway, this project is with one of my favorite clients, famous for her support of our art and for her patience ... and now we have finished it up and delivered it to its new home ... click the photos to enlarge them .
 this one's now in a room between the kitchen and is actually part of the family room i'd call it, overlooking the deck and pond and facing the bird feeders ... a great, sunny spot for writing and contemplating. there was a new lamp and income tax stuff on it last time i saw a picture ... i was glad my taxes were already done ...
 as far as the design went, our friend had seen a number of our wood and steel pieces, including the bureau, so metal legs were part of the early discussions. at first, in the drawing above, i was trying on sort of 'planar' legs, sort of a two dimensional, flattish, 'stuck on' leg, but in the end, we could tell from the small mockup we made that that concept wasn't going to work ... back to the 'table leg' concept, but we all felt something 'new' was in order. an adaptation of our 'egypt leg' seemed like it might work and we made a prototype ... it looked good, and we were off. sort of ... next to find a one piece top 26" wide and long enough to 'fold' the sides over to become the dovetailed case ends with continuous grain ...
 hard to believe, but myron at irion lumber had a piece of 5/4 about 28" wide that we milled on our cnc to flatten it ...
 and sanded it with our friend steve holman's 37" wide belt sander ... nice and flat ...
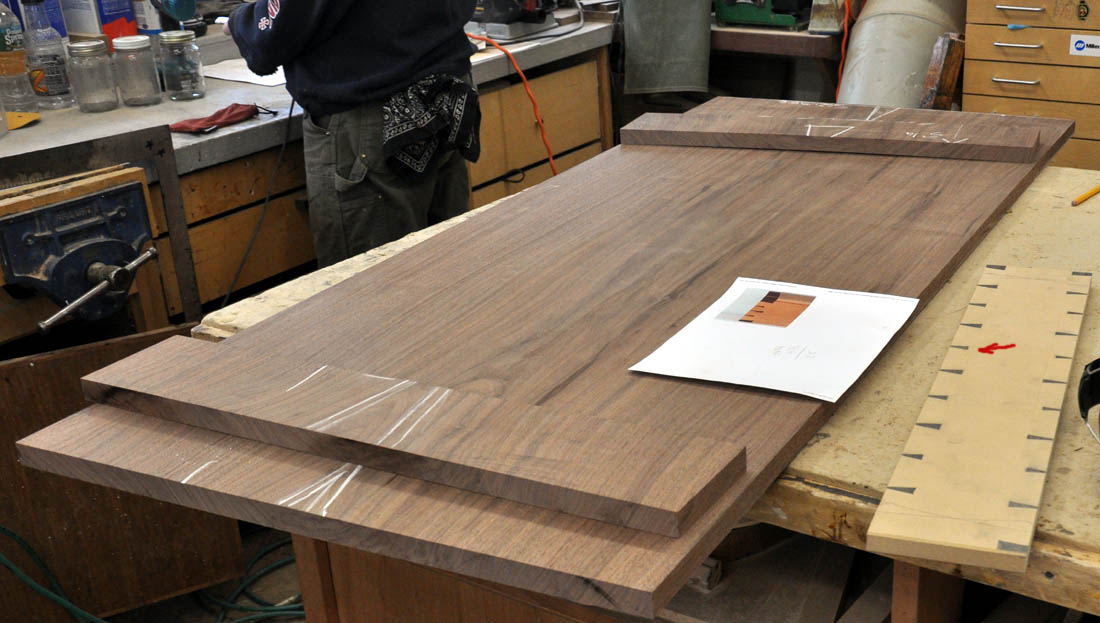 we cut and marked the ends and made the half width sample with the last little cracked end of the board ... we spent sometime on the layout/design of the dovetails as it was an important part of the design .... for inspiration we did a 'google image' search of dovetails and found some we liked that seemed interesting ...
 these are sometimes known in the trade as 'houndstooth dovetails', pins of varying depths and spacing ... attractive; challenging; decorative ... they seemed a perfect way to break the monotony of 26" of hand cut dovetails ... elegant too, i think ..
 the fitting of the thick tails and pins was tricky, the cutting and laying out trickier because of the thickness of the sides and the tight points of the pins ... will had to stand on a stool to cut them ... and, we had to build a temporary 'wall' that we attached to a workbench face and braced so that the 62" x 26" top and bottom didn't flex during the handsawing process.
 'the wall', in action .. you can see how it would hold the top and bottom boards steady for the hand saw cuts. the wall later became part of the tv cabinet mockup in one of my previous posts ...
 once they were cut, it was a (sort of) simple matter to rig up the multirouter to waste the pin to pin stock ... we took off the air clamps and screwed a piece of 50" long plywood to the table and then moved it along as needed. we set up the router table to carry the outboard end ... that concept made short work of that process ... check the short video below to see how it goes.
 we use this technique on all our handcut dovetails ... cut the pins on end on the table saw with a thin kerf blade, clear the waste; trace, saw, rout and cut out the corners ... a person can get really fast at it ... there's a short youtube video here of this operation.
 our second initial leg concept, we also were not 100% thrilled with when we first assembled the desk, but we were able modify the tops of the legs to make them look more like 'legs' than sort of abstract appliques. this is part of our krenovian tendency to sometimes 'design on the fly', a useful process for extricating yourself from 'not quite right' design visualizations.
for the hardware, we choose an image of a brook trout and had the 3/16ths inch stock waterjetted to shape ...
 sam did some shaping and chiseling to add the details and then welded 7/16ths tapped square stock to the center of the backs ... we then chiseled a 3/16ths deep mortise for the ends of the square stock into the drawer face to keep them from turning ... and we were good to go ...
in the end, we added a secret compartment, but if i told you about that, it wouldn't be a secret anymore ... anyway, it would be tough to find if you don't know where it is and involves the use of a tool to open it that will made and hid in the case of the desk ... double hidden compartment, actually. we try to get them in wherever we can... case pieces are easier ....
 the back of the desk we used three shop made crotch veneered panels, similar to the drawer faces as you will be able to see the backside of the case from outside on the desk .... we always finish the backs of our desks anyway, so they can be used in the center of the room ...
 as they say, 'all in, all done' ... next! ....
4 comments:
What a GREAT post! I LOVE that desk. The shape of the legs are so simple, and so sweet. Round on the inside, square on the out. Love it!!!!! CNC for flattening as well. What a great idea for large materials. Now I want one. :) I really like your dovetailing process as well. Dan, your work inspires me to do better every time I read a posting. Thanks for sharing!
thanks jason ... and your comments inspire us to better work and write better blog posts too !! thanks for letting me know what you think. the feedback is much appreciated ... dan
Beautiful piece! Is that claro walnut?
hi rob, it's american black walnut from irion lumber in pennsylvania
Post a Comment