Wednesday, January 28, 2015

some sapele slab stuff


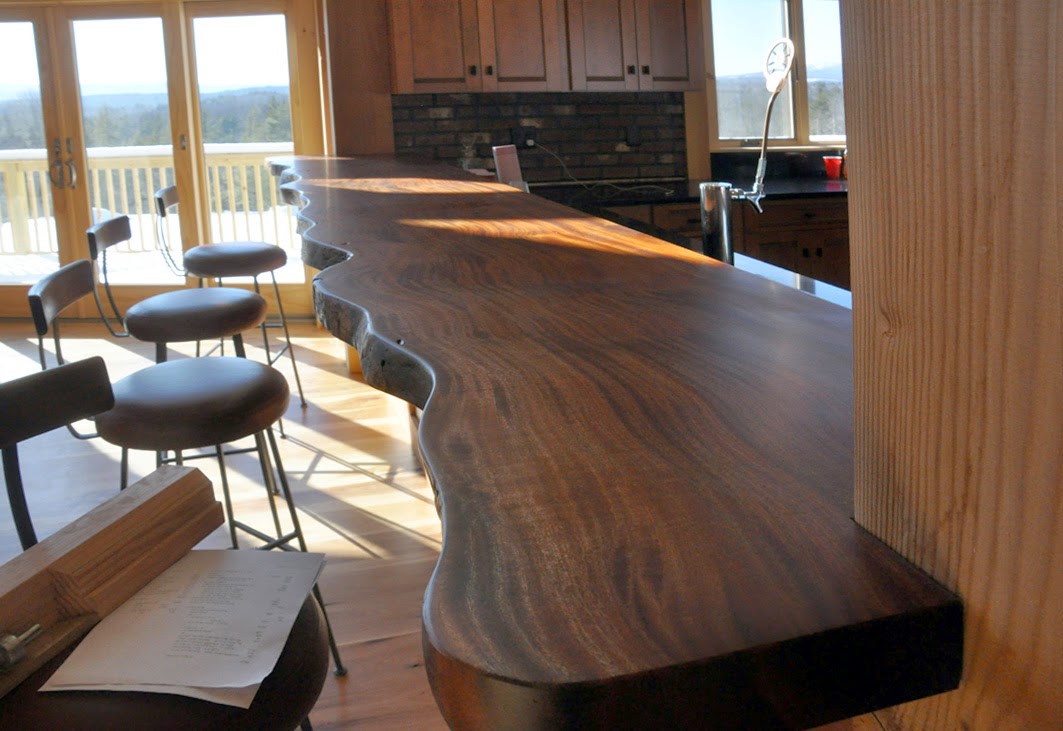
one of our clients purchased a sapele slab from hearne hardwoods long before he started the house he's finishing up right now ... it was about 51" wide at the narrow end and must have been at least 60" or so at the wide end.  if my math is correct, it was about 17' long before they cut it.  it had a long natural crack down more than half of its length, and the plan was to have it cut into three pieces before shipping.  one piece was to be the bar top above, about 25" wide and almost thirteen feet long when we got it.
click the photos to enlarge them ...
the other half of that part of the slab, we cut in half lengthwise to make the top of a +/- 60" wide by 6' long island cabinet in the kitchen .. gluing up two slightly cupped +/- 30 inch wide 200+ pound slabs of wood proved to be quite a challenge for us.  we ended up setting the 7" high fence on the jointer at a slight angle and then handplaning the two slabs to fit and clamp up more or less flat ... the wood is extremely  tough, heavy, and dense, and unlike narrower boards, we weren't going to bend them much to make the pair come together .
pretty proud of that glue joint in the end if i do say so myself .. i had to use the old long jointer hand plane.  sometimes the old tools are the best tools ..

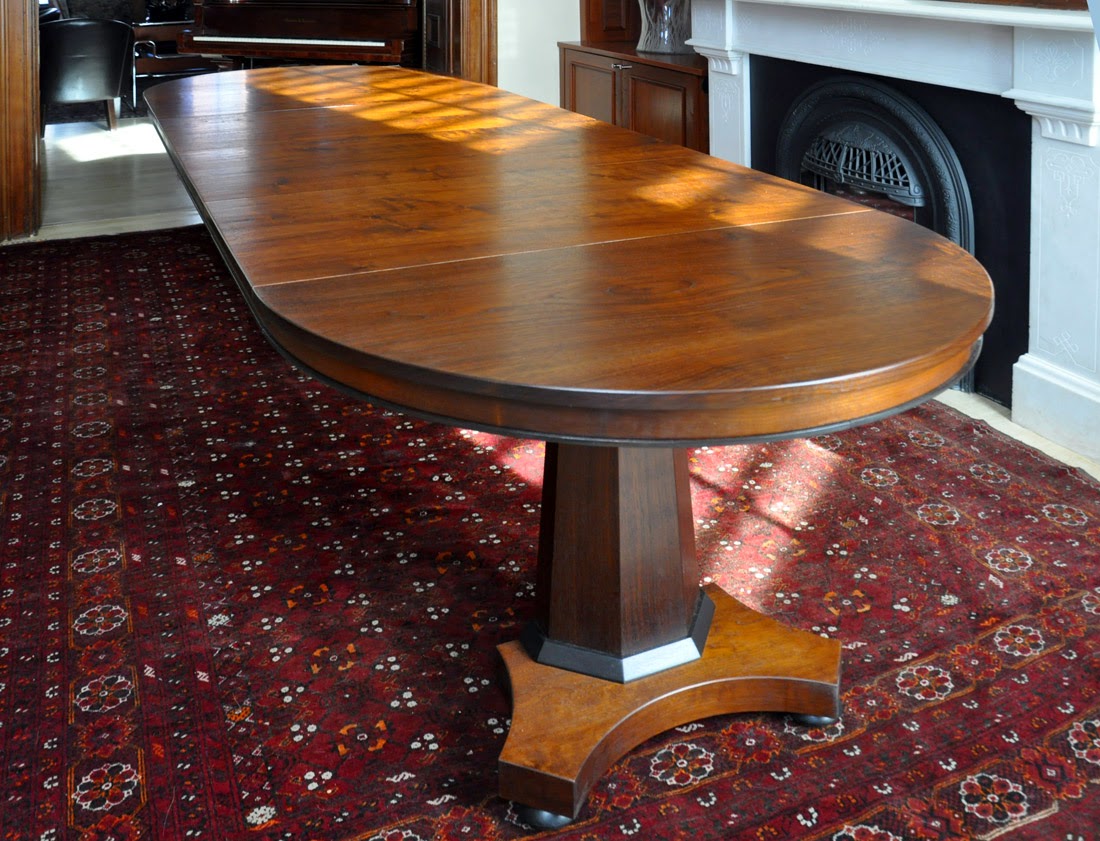
and the piece you might typically refer to as the 'drop' or the 'cutoff', was 38" long and 51" wide after we squared it up and cut off some of the sharp points.  we had to flatten that one on the cnc as it was cupped by about 3/8ths inch across its width.  sam welded up a variation of our 'criss cross' steel base, and we were good to go.  we finished it with one coat of gloss and a topcoat of 'dull rubbed' lenmar varnish by ben moore, our new favorite poly top coat.

and moday, before the big snowstorm (hah, hah ,,, 6"?? maybe?) chris and i went to the house and started the finish process on the slabs we installed back around christmas .. we had no place to finish them at the time as the finish room was jammed up full, and the client wanted to use the house over the holidays.

beautiful wood .. i have never used it in slab form before and have only purchased it in the past as narrower, quartersawn boards, when it is known as 'ribbon stripe mahogany'.
so here they are now above, all nicely in place like they were just perfect right off the truck ..
you'll notice in the bar top photo that the 2.5" thick 12' 8" long slab wraps around and fits between two fir 8 x 10's that were part of the framing, long before the heat went on .. one was nice and straight, and one was cupped about 3/16th across its face .. we needed to cut the notches in the shop where we had the right tools, so we made a 2 piece, full length, mdf template that we fitted on site ahead of time ... we had to leave enough room to be able to slide the salb in horizontally, but still have it fit the slightly curved beam on the right end.
all's well that ends well, and we didn't have to modify the notches onsite .. both of them took at least 4 or 5 people to move around .. glad they are in place and looking good. here are the ijg photos ..
 fitting them up on site .. this beam was straight as an arrow across its face.
 the other end, not so much ... the bar top had to overhang the backsplash by 3" so the notching cut was actually about 13" long ...a tough cut ..
plus we first had to lay out the straightening, paralleling cut before we could start the notching .. i'll tell you, that is some tough wood.  i actually burned out my favorite skilsaw making that 12' rip cut.  we'll be back to do more work at the house there and i think i need a shot from the balcony above once the counters are all done.  maybe friday ..
 upstairs balcony .. railings by sam
railing to the upstairs .. ditto
update 1/30 // photos from the balcony above, below


Sunday, January 18, 2015

handwork? machine work? does it matter?

blow this one up and have a closer look at it ..we made these in 1997 ...
pretty classy, eh?
they are based on a half round federal card table in the clark art museum that we got permission to measure and flip upside down earlier that year.  we also used a copy of  'the work of many hands: card tables in federal america 1790-1820', a weighty tome for sure.   these tables are also our very first cnc project.  each leg, if you count each separate little piece has 90 pieces, some of which we obviously glued up in blocks and sliced like baloney.  the ovals were custom made by dover inlay in maryland, but the little satinwood bell flower drops and the larger oval satinwood panels were cut on my friend richard's cnc. the rest we did 'by hand'.  there are 43 blog posts regarding cnc work in the category to the right,
'trevor's cnc projects'

on the fine woodworking website today, there is a debate over the distinction between 'handmade' and 'assembled from machine cut parts', 'digital manufacturing, friend or foe', a false debate in my humble opinion.  turn on the table saw and you are no longer 'handmade'.  in the comments to the post, where i, in fact, left my own two cents, i particualrly enjoyed the opinion of belchior, from brazil:
 

 "Since it's almost impossible to produce something from wood using bare hands and teeth, let's suppose that tools are considered acceptable, for the purpose of this discussion."  perfect !!  

so, onward.  we make stuff.  we use the tools we have to do the parts of the job we need to do, be they hand, electric or digital.  we go forward, exploring the process, which in the end is, hopefully, where the pleasure lies.  here i give you some 'before cnc'; 'with cnc'; and 'after cnc, but not using the cnc', images. 
you be the judge ...
friend or foe?  click the images to enlarge them ...
before cnc, about 1992  ... cherry lacewood, burl, rosewood, milk paint
  after cnc .. 2010 .. much technology here, both cnc and waterjet.. blog posts here
cad/photo design, cnc cut lathe duplicator templates; hand finished turnings; hand carved turnings, steel, copper, aluminum, and brass waterjet cut inlays; etc. etc.see end of this post ...
before cnc; about 1990
after cnc, but not using the cnc  blog post here  .. 
we did use our duplicator to turn the legs, a tool for sure, but not digital
way before we knew what a cnc was.. 1983 .. the cnc would have been  
extremely helpful on this project though.

all handwork ... 2012 .. blog post here  .. 
could have used a cnc but it was faster to do this by hand
1989 .. this table would be a lot easier with a cnc, but we did it all by hand ... slowly and carefully
with holman studios ... 9' x 26' , 88' radius on the edges. all parts, including templates for the granite and the base parts on the cnc.  design, veneer work and finishing by steve holman; call parts cut on the cnc by dcf ..
can't imagine doing this table by hand, though the guy who cut the radiuses on the granite cut them freehand with a handheld 4" angle grinder with a diamond saw blade ..
granite cut here .. no cnc
about 1990 .. all by hand ... a wonderful, fun project
all cnc  a room screen from 2006
with the table above 1992 .. all hand work ...
so, the question is: can we make furniture that appears handmade and combines handwork with digital fabrication?  yes is my answer.  is the digital process good?  is it bad?  does it matter? can we call a truce?

i hope so .. the digital part is not going away, and, in my humble opinion, it shouldn't.  imagine ... 


Friday, January 16, 2015

a round walnut table with leaves

i delivered a table to south boston earlier this week ... great neighborhood,  lots of old 5 story brownstones with original details .. the front doors were just fantastic .. the houses are narrow, 19', and the counter on the right in the room above is part of the kitchen, so the room we're looking at in this picture is only about 9 or 10' wide, including the fireplace .. so, it's tight.
click the photos to enlarge them ..

the request was for a smallish table (42" diameter) that would live in the round bay window
 most of the time, and then open up (to 10') for friends and family gatherings.  it is based on this slightly fancier version we made back in 2008.
this one is mahogany with burl and ebony accents.  and a little smaller at 39" in diameter.
it opened up almost as far though, and was in a philadelphia brownstone on pine street, 
that was of more or less the same era.

here's the new one, opened up to its full length in the sunny, and inviting space.  there are normally  two chairs in front of the fireplace and tv, that can be easily moved out for large gatherings...
super elegant neighborhood now, but my client tells me that a lot of it was boarded up when he moved in about 30 years ago .. never know it now .. interestingly, across the street, all the houses have angled bays, while on this side they are rounded.
 sunny neighborhood!
we started with some fine irion lumber walnut
 the boards for the main top we're about 18" wide, and trevor flattened them on the cnc
then he cut the plywood base pieces with the round space for the center leg, and veneered them 
with 1/16th" walnut.  as usual, the extension runners are from our friends at moin hardware ... 
 
we had to order a set of custom slides, which was no problem at all for moin.  you need to have an odd number of segments in order to have a center leg.  in this case we had 9 segment runners ..in this case, because of the wide opening capacity, (106"), we may be making another 15" leaf to make 
the extended table as long as possible.
here it is, before finishing and hardware
fun project !
at the same time, trevor is also wrappping up this 66" round table with three leaves.  similar to one we made earlier this year .. that one will be ready to roll next week .. more photos of that one when it's completed.
you all have a lovely weekend ..