Friday, April 8, 2011

road trip

it was our first really beautiful spring day yesterday ... fortunately i had made previous arrangement with frank pratt of frank pratt restorations a local building salvage/lumber recycler/beam and flooring seller to resaw some chestnut beams for 4 upcoming projects ... click the photos to enlarge them ...
frank is here sawing up some chestnut 'sleeper' logs .... handhewn on two faces only ...
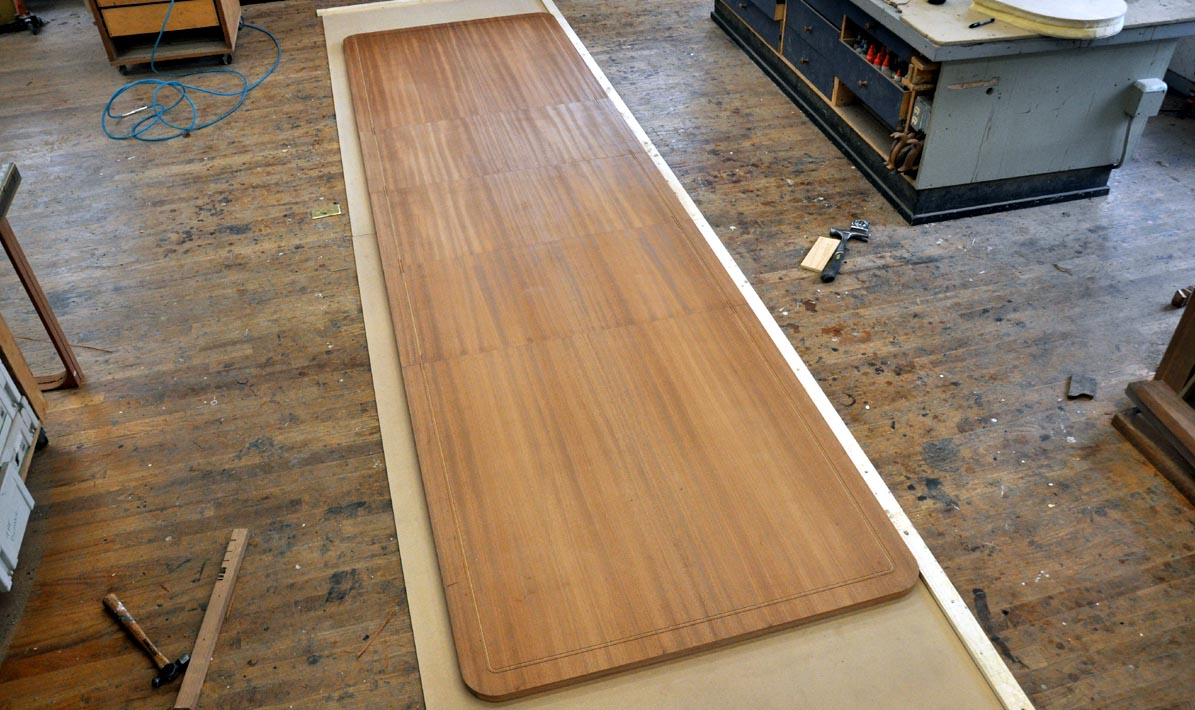
the first table we're sawing for is a 46 x 108 chestnut ' post and beam' table for a covered porch in georgia ...
the second is an expanding chestnut dining table similar in form to other classic empire inspired pedestal tables we have made over the years ... this project is at stratton mountain, vt, about 40 minutes from the shop ...
on that same project we also have about 60' of chestnut rail cap to go with some steel railings sam is fabricating as well as the cabinets pictured above. the photo above may look like a completed project but is actually a photoshop mashup of an empty room with part of a cabinet we made about 7 years ago...
as the room is now .. like i said, empty ...
cambridge, ny is on the other side of the western green mountains so coming home i was looking back into vermont, an unusual but dramatic perspective for me...
and the architecture over that way is unbelievably different from here ... i think this is some kind of italian revival thing, out, literally in the middle of nowhere ...
i think farming was a pretty good business at some point ...
and here, 10 miles away from the one above, is another, even more impressive spread ..
nice farmhouse ..

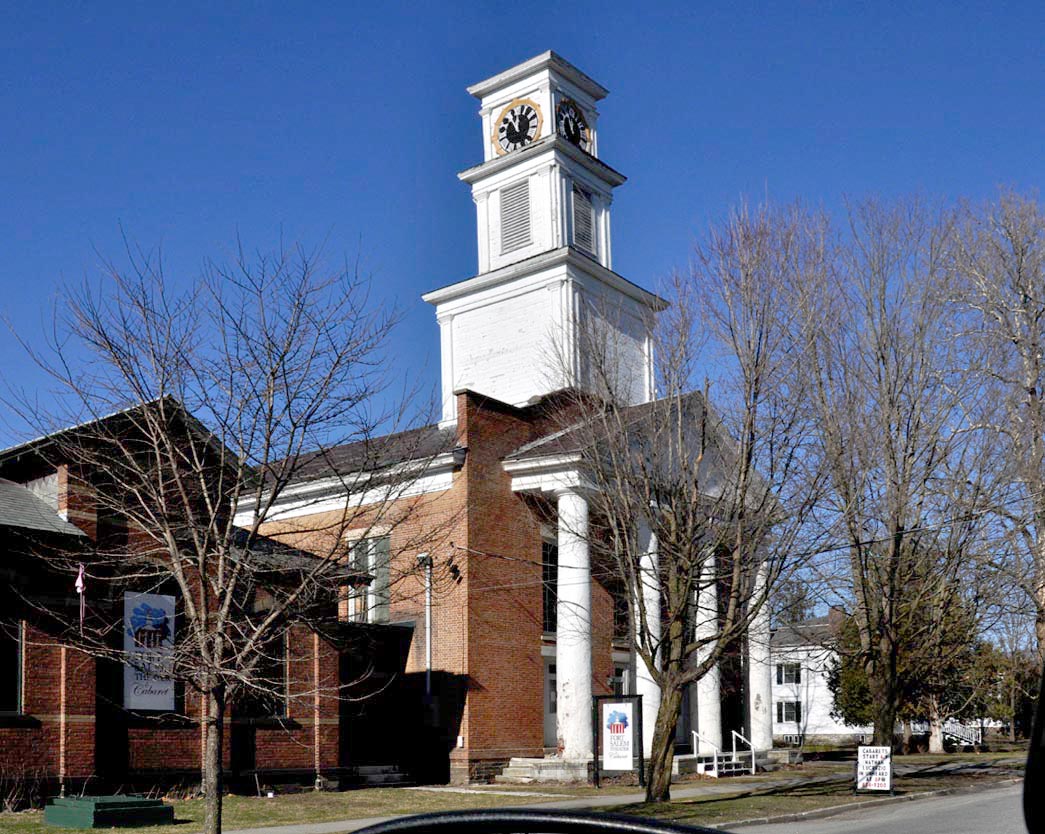
home past the fort salem theatre in salem, newyork ... a classic greek revival ...
and past the fine church in rupert, vermont with the painted wooden clock faces ... i took this picture last summer, but i missed it yesterday ... it looked just like this, only without the gray sky and green grass ...

and home in time for sunset in the dining room .... nice day !

Tuesday, April 5, 2011

more cockatoo chairs

these two left for boston yesterday ...
ok, here's the challenge ... make a windsor chair out of metal ... the backs legs and bow are made on a home made form of angle iron and plywood, loosely based on one of my chair back bending forms. the back legs and top rail are one continous piece of 3/8ths solid steel rod, bent slowly, by heating a section at time with a handheld acetylene torch. the rounded seat frame is bent the same way and welded on its own form. ditto for the front legs .
sam made these four chairs back in 2009 but we never documented the tricky part, drilling the holes in the back rails. so, sam when asked me for a refresher course, i decided to document it for him this time ... i started out as a windsor chair maker back in 1980 and i have made my share of them. i won't say how many as i know you probably won't believe me ...
we kept the original prototype luckily, and sam used it to make comparisons as he went along. there are no drawings of this chair so it was also helpful for laying out the spindle and 'cage and perch' spacings on the new chairs ...
the first step is to mark out and drill the holes in the midrail, but only halfway through ... it is really important to buy yourself some brand new cobalt drill bits for this task as the bow steel is hardened a bit by the heating and bending/shaping process. in the photo two photos above, the spindles are inserted in the mid rail and used to 'sight' the hole angles as you are drilling the top rail. for sure an old windsor drilling trick. when drilling these holes, you want to start small, like an 1/8th", and ALWAYS start perpendicular to the bow curve ... once you get started, gradually change your angle until it 'points' where you want it to go .. a little dab of 3 in 1 oil about halfway through the 18th" hole never hurts. after the 1/8th", then follow with a 3/16ths", which, in this case, was the final spindle size ... see the video below of enlarging an 1/8th" hole to a 3/16ths ... sometimes the start is a little tricky ..

i'm testing loading a video directly to my blog rather than putting it on you tube with a link ... let me know what you think ... better? worse? don't watch videos? don't care? thanks ...
sam fabricated and welded on the little metal feet and painted the waterjetted cockatoos with glossy enamel house paint. trevor did the seats in the client's outdoor worthy fabric ...
all for now ...

Thursday, March 31, 2011

a pin and hole jig

we had a little run of tables with leaves lately and it caused me to appreciated anew a jig we made a few years back for drilling pin and holes in table leaves. above is the walnut table we finished recently .. that had three leaves. click the photos to enlarge them ..

the jig could be made of all wood too, but we chose aluminum for the top for light weight, thinness and stability over time.
you can either use a center mark and arrange the orientation so that you use one side for holes and one side for pins as shown in the top photo or you can cut everything to length and square first and then use the sliding stops shown above .... you can purchase the drill bushing you need to build this jig from mcmaster-carr ... we have different spacings for different table sizes ... in the cad drawing, i drew ones that i thought would be universal. we don't have that many, but if i were building it again, i might ...
i tuned it up for this long table with 4 leaves we were cutting on the cnc for our friends johannes (the wood hat guy) and deb, who are building the table. sample test pieces above ...
after installing the holes and pins, trevor put it on the router, cut the channels for the mother of pearl inlay, the rounded corners and all the leaves to length ... i suppose you could do this by hand .... but i wouldn't want to ...
the blanks being checked for square, straight edges and parrallel.
the finished table parts ... lined up fine ...

Wednesday, March 23, 2011

a walnut slab bed

the completed bed
3/24/2011 ... we'll be finishing up an interesting new bed project today or tomorrow. it started with an internet request and an inspiration photo. we offered a couple of photoshopped options and settled on using some local slabs i had bought from lathrop's lumber, specialists in vermont wood, in bristol, vermont.
as is photo from the client ....
photoshop option #1 ... photos of the slabs we used in the end, cropped and floated behind the existing bed
option #2 ... wide planks glue up square and straight ... the more time you spend with photoshop, the more rewarding and handier it is ...
the actual slabs cropped and photoshpped into shape
here's the layout ... click it to see the details ..
the end result, in process ...
discovering the high and low points ...
having at it early on .. trevor is great with the power planer
deciding which way is up ... not that way ...
we added some butterflies ..
we needed quite a few ...
will fabricated the drawer boxes ...
glued them up ..
and made some drawers ...
and we erected a temporary timberstrand wall to lay out the french hooks that will hang the bed on the wall ... they will have to be drilled and screwed to the studs in on site, (florida). fortunately the client is a tradesman and undaunted by the process ... wrap up photos later ....

12/7/2014  .. we finished another version of this bed recently  more photos at that link

Saturday, March 19, 2011

a big ash table

we are coming down the home stretch on an ash table that is based on the design below that we completed about a year ago ... the base is welded 3 x 3" steel tubing and it has a clear, natural finish ... the top started out as 12/4 (3" thick) which we flattened and planed to 2 and 3/8 ths" thick. it has breadboard ends, secured with splines and 4" timberlock screws, which are covered with end grain white oak 3/4" plugs ... fairly straightforward, except for the size and weight, with a clean contemporary look. in the photo above, you are actually seeing the bottom of the table top which will be flipped and final coated tomorrow ... ready to ship to martha's vineyard later this week ... click the photos to enlarge them ...
we made the base for this recycled spruce slab top last december ...
this table is 54" wide and 9' long ... the finished slab top weighs about 250 - 300 lbs ...
above you can see the breadboards before trimming ... we mortise and fit the plugs while the breadboard end is off the table, flush up the pegs, knock them out from the other side, trim the ends and reinstall with the bolts and the plugs ...
since the top is so thick, we installed the splines above center and the bolts pass through the breadboard and into the solid wood. typically, in a thinner table, the bolts or screws have to be long enough to go through the breadboard and half the 1" spline in the table top .
the spline slot is stopped in both the table end and the breadboard, making it invisible when the table is finished. the splines are about 3" wide and are glued only into the table top with the grain of the spline wood oriented in the same direction as the grain of the table top to eliminate any problems with cross grain expansion and contraction ...
the bit used to cut the splines ... 1/4" x 1/2" deep slot
the base tubing has caps welded on the bottoms of the verticals and the 'aprons' are 3" x 3 X 3/16ths angle iron ... plenty stiff enough to support the top ...
a couple close ups of the finish on the steel ....
one more photo coming when it's finished ...