Monday, May 15, 2023

another interesting repair ...


this one came in last week ... missing a few pieces, 
but the main parts were all there 
had to make up a few of the missing inlays
a little glue and masking tape
getting everything to match involved some stain, 
some acrylic colors, and some shellac and wax
ready to go back home ...
nice spot for it!


Friday, May 5, 2023

a few repairs ...


from a previous post 

 we have been fixing stuff for as long as we have been making stuff.

it is an often interesting part of the gig. 
'you make furniture?'  ... 'can you fix this?'
typically that's how it goes ... and we do 'fix this' ...

here is actually my favorite rescue ...

anyway, we fixed a bunch of stuff last week and i have
one more item to finish for those folks ... 
some were easy, others a little more complex.
we had three pieces of gallery that need repair or replacement ... 
fortunately, we had one almost complete one that we 
could scan and draw over in our cad program ...
we thought about repairing this one, but decided
 once we made the two others, it would be easier to 
just replace it

the two on the top left are new and the one on the far right in the front are new
there was also a pullout below the glass door where
the face flipped down and created a little writing surface.
that needed a repair to the catch and a little wax and love ...
we put one of the drawers back together and replaced
three missing drawer glides on the side of the case ...
a worthy restoration!
and there was a drop leaf table whose leaf had dropped off ...
the screw holes for the handmade hinges were totally
stripped out on all three mortises of  one leaf,
which called for what we refer to as a 'proper repair'.
we did just plug the third hole, but we glued a piece of new wood 
for two of the screws to bite into on all three hinges
on the other leaf we only had to plug one hole ..
once we got the leaf back on, we sanded the finish lightly and 
applied two coats of waterlox oil finish as the client
did not want to refinish the table, which can kill the
antique feeling.  it looked sharp in the end ...
crazy thin wood on the drawer bottoms and sides ..
i had to add some glue blocks, no room even for brads ...
and a bed rebuild ... the screws for the steel rail hardware
 were stripped out, and we were able to replace them with longer
screws .. we reglued the footboard post and made new slats ...
i have one more 'eastlake' piece that needs a backsplash 
i am working on the design concept still

this ain't it!

this piece is one from google images search for
'eastlake furniture' and the piece i am repairing is of the 
eastlake style ... i don't think we would find marble to
match, so i am suggesting wood to match the cabinet ..
there was a splinter in the drawer, and an obvious place 
for it to go ... 
 
more repairs next week ...
have a good weekend!

Tuesday, May 2, 2023

a mahogany sideboard

well, in my previous post i mentioned that we had TWO 
challenging projects ...  here's the second one .. 
click the pictures to enlarge them
a few inlays, some nice mahogany, a natural finish,
what's the big deal? 
like a lot of things, if  you do it right, it all looks easy.
ever watch a good golfer? try that and see how you do ..
so, we had some info from a designer that determined 
the basic inlay layout and colors
it was relatively easy to import that image into our cad program
and draw over it, keeping as faithful to it as we could ...
but then we had to make the wood look like that, and
have all 50 little leaves fit precisely into all 50 little pockets
that Kristian cut for them on the cnc.  we first tried cutting
them and sticking them in the pockets, sanding them flush,
then taking them back out and painting them, woodburning 
the veins into the leaves and gluing them back in ... 
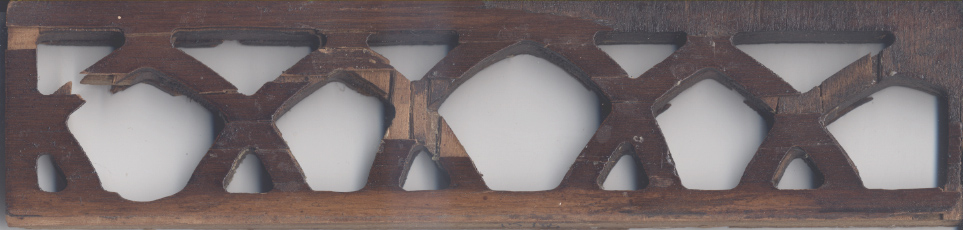
this is the general idea, in walnut. originally it was
going to be a redwood piece, but at $42. a board foot plus shipping
and not easily accessible in the rough, we tried walnut and
in the end settled on some old, wide, short, 
6/4 x 3' mahogany boards i had on hand ..
tedious for sure, and tough to glue them in perfectly flush.
the paint could not be sanded even a little bit or the 
wood showed through. will suggested that we try some of 
the pressure dyed colored veneers he uses for his
banjo inlays ... BINGO!
these veneers were a little over a 32nd thick and kristian
 epoxied them to some 1/16th inch poplar, cut them to fit,
sanded them flush and made some test panels from mdf.
the branches are made up of multiple pieces of natural walnut
joined in the obvious places ... lots of pieces there too!
there was a thought that we could add some 'falling leaves'
to the third door, but they didn't seem to fly.
 and did i mention the refrigerator?
all kinds of complications there ... 
the door rises as it opens and the door can only be so thick
or it binds on the case before it gets to 90 degrees.
'do not obstruct the vent in any way' said the
instructions ... but it's ugly
and there's a switch that turns the light on when
you open the door. we compromised by making 
some slots, cutting the switch thing shorter and using
magnets to allow the base piece to be removable as needed.
anyway after some trial and error and some serious back and
forth emailing and sample mailing, we were able to 
wrap it up last week.  we are waiting for our shipper
to  grab it and deliver it to asheville ... 

hats off to kristian for pulling this one off !!!!
it was not as easy as it looks!