Tuesday, January 25, 2011

Sam's Railing

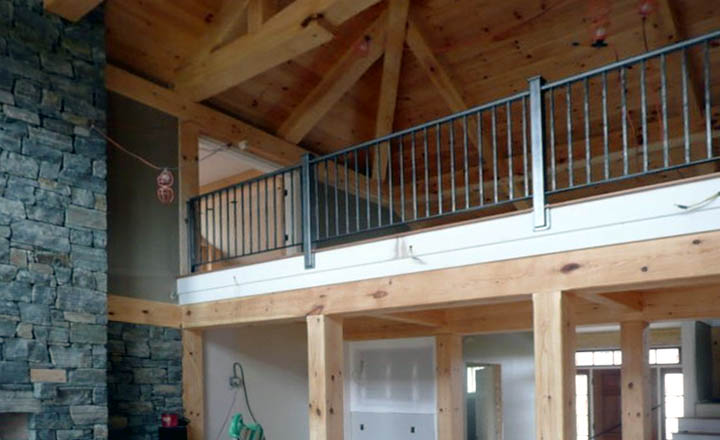
Sam is coming down the home stretch on a big railing project he's been working on for a while now. The first section went in before the holidays and the second section went in yesterday ... The last section that goes down the steps in the photo above has been templated , the parts are completed, and welding on that section will start tomorrow ... Click the photos to enlarge them.
The first step was to make a full size template on site.
The post fabrication is sort of technical and fussy but very effective and rigid when installed .
Then back to the fabrication department above ..
There was a little on site welding ...
And then, back to the shop for the last section that goes down the steps in the photo above ....
The main balcony section is a long one ..... 20' or so and solid as a rock ...
Looks good from below, too ...

Friday, January 21, 2011

The Bureau Is Finished

Well, all is not mdf here even though it may look like it in my most recent post ... Will finished up the double bureau yesterday and as I suspected, the cherry is spectacular ... This is my first photo session with my new lights and I think I can do better. The cherry seems kind of 'cool' compared to the real thing ... It's still set up so I've got all weekend ... Click the photos to enlarge them ...
this was a hard piece to photograph with all the 'action' in the wood grain ... i took the one above recently and it looks like we could call it 'bee's wing cherry'.
It's interesting to see how the design evolved as we progressed. If you check the cad drawing in the previous post (linked above) you'll see we started out with the legs pointing in the opposite direction, which is the way we've always used them as table legs. in this case, when we were waving them around before they were attached, inverting them seemed to give the bureau more connection and a 'better' feeling .... The cherry was soooooo nice, we debated the hardware choice until the very last minute ... In the end, we didn't want to 'clutter' the look of the piece and Sam is in the middle of a big railing project anyway ... So, brainstorm, imho ... continue the bolt theme with lag bolt pulls ... There was some concern about getting them installed exactly perpendicular, so we made the jig below. First we drilled the guide holes on the drill press, marked out the centers, stuck the brad point drill through into the center mark, pushed the wood guide firmly against the drawer face and drilled the pilot hole. Next we put a longer lag through the wood guide block and screwed it home. That created the perpendicular threading for the actual, shorter pulls which we installed by hand in the precut threads ... there are four 1/8" thick carpet glides on the back of the jig to protect the finished drawer face while in use ...
Below is a close up of the metal finish on the legs ... The angle iron was dynabraded (rotary air sander) with 80 grit and 120 grit. next it was treated with a chemical called ‘ready brown’ from Sur-Fin Chemicals that works on brass and steel to quickly darken it to a brown black color. After treatment it was neutralized with a solution of baking soda and water, sanded again to add highlights, and top coated with ben moore ‘high gloss, low lustre’ metal finish … sounds complicated, but isn’t …
Great job Will and Sam ....

MDF Is .....

Commenting Assignment ..... MDF (see post below) is:

* The Killer App
* The Devil's Right Hand
* Never Touch the Stuff
* The Shakers Would Have Loved It
* Maybe, Maybe Not
* A Slippery Slope From Which There Is No Return
* Has No Place In "Fine" Furniture

Discuss ....

Sunday, January 16, 2011

MDF ... More Done Faster

MDF ... Stands for a lot of things in our shop ... Technically, the trade name is medium density fiberboard ... other possibilities are More Done Faster, More Done For less and More Dust Forever ...

We were slow and resistant on the uptake for sure, but have come grudgingly to admire it's many fine qualities such as flat, cheap, stable (or at least more stable than a lot of other materials), great for quick mockups and models, great veneer substrate, machines very well, relatively strong, paints great, did I mention flat and cheap? Anyway, I forget how we were first introduced to it but I know we hated the dust and the fact that it wasn't 'real wood'. The dust is much less annoying than it used to be as we are now much more careful to capture it at the source and, unless it's my imagination, the dust has become less corrosive and irritating than say most zebrawood and rosewood, some mahoganies, and the merado I was cutting on the bandsaw today. That one caused Trevor, who was working 10' away to come over and open the damper on the bandsaw where I was cutting chair legs.
But it's a great thing to be able to mockup a chair like the ones above before you build them out of solid wood ... Click the photo above and enlarge it and you'll see some lounge chairs. One is solid mahogany and two are painted mdf with sold wood arms ... Can you tell which is the real wood chair? Didn't think so ... Also in that photo, there is a painted mdf sculpture, and a round mahogany table with a painted mdf base that started out as a pool table leg mockup ...
Recently I was asked to make some furniture for a client's guest house. Since they already have several of my solid mahogany lounge chairs, they asked us to create a couch version. I wanted to replace a loveseat in my house that I made from a previous mockup about 10 years ago, so I used their request to explore the concept in mdf .. It seemed to work so well that I suggested the guest house couch be made the same way. Because of the reduced cost, they ordered two couches and two chairs ... Not a problem for me ... The tapered thing in front, was an idea that occurred to me as a reading lamp and what the hey, we'll make an mdf one of those too while were at it ... No problem ... You can see the finished lamp and the round mahogany table base better in the top photo.
Trevor added the poplar seat support frames and the upholsterer came by to measure for cushions today ... we'll start the painting and finish the solid wood arms tomorrow ...
We also had a request for an unusual mirror frame ... I couldn't figure out how to work around the short grain and narrow frame joinery/clamping issue and since it was going to be gold leafed, hey we'll try that in mdf too ... Gold leafed mdf... I love that concept ... Now if I can just get the mirror cut .... We talked to our waterjet guy today and it may come to that ... Waiting for quotes ...
The mdf takes a nice detail for shadows on the 1.5" frame.
The 1/4" mirror pattern was nice and flat too ...
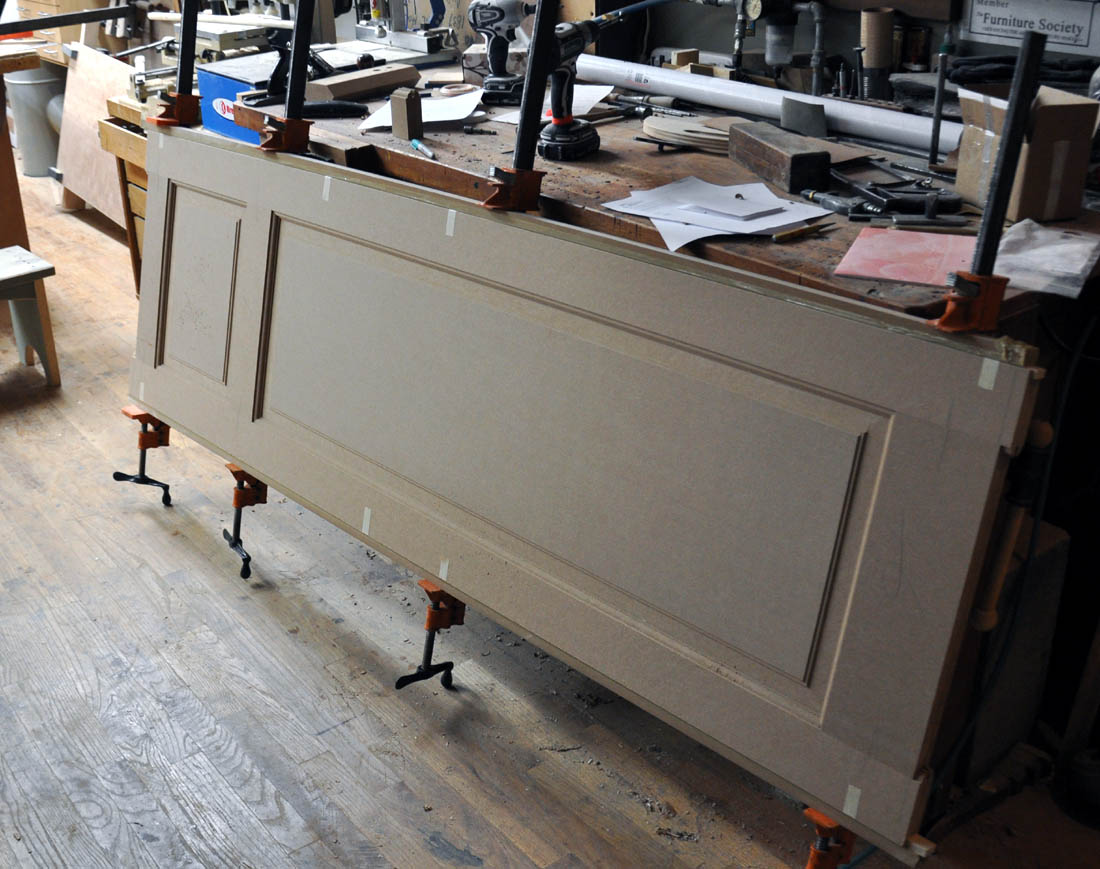
And then, over at the big island house they needed a custom pair of tall closet doors. The other 30 or so doors in the house were made by the TruStile Doors folks, entirely in mdf with some poplar edge inserts, but their lead time was 5 weeks so we were called on to the job ... it went way better than I thought and the doors were flat, square and true when we were done ... Since they meet in the middle with no center stile, they probably have a better chance of staying in alignment than a pair of poplar doors would ...
Below we're gluing up the stiles and rails using titebond II .. quick and easy, and did I mention flat?...
And lastly in this post on MDF, I'll link to our previous posts on display fixtures and the beauty of mdf for creating those .... Literally, we couldn't do those jobs without it ... Wagathas dog biscuit racks ... made over a hundred of those already .. and our not quite patented Vew-Do balance board racks ....

Friday, January 14, 2011

A 'Bethlehem Steel' Bureau

I'm sort of fascinated by the wood and steel elements of our newish 'Bethlehem Steel' line. We have been working on it for about a year now and this is the first case piece ... There just seem to be endless possibilities here ... This one started with the drawing above, but as we were building it, even though all the other tables in this style so far have had the legs pointing down, this piece definitely seemed to want it's legs inverted, pointing up. OK, we'll listen. We turned them over and the results are below. More anchored to the ground, but yet lighter feeling at the same time .... Sometimes you can figure things out in the drawings, but sometimes you have to let your instincts take over .... The piece, to us at least, seems to be stronger and more solid in this configuration ... Click the photos to enlarge them ...
The case with side shims and full extension undermount runners ... It's the first time we tried the Grass runners ... So far so good ... They seem to wobble a bit less when you open and close them , and close a little faster than the Blums ... Cheaper too from our supplier ... The high dolly was a brainstorm too ... Hate, hate, hate crawling around on the floor ...
Mocking up the bolts with masking tape .. three holes or four ?? Three it is ...
More bolts in the front center leg ... This is some of Irion's finest figured cherry .. I've had this log for several years waiting for the right project ... We had Just enough to make it ...

Thursday, January 13, 2011

Efficiency Vermont

Whether you know it or not, those big fat florescent tubes you have in your workshop now will no longer be available in 2012. Here in Vermont, we have quite a progressive program called Efficiency Vermont that helps industry and other smaller users of florescent lighting to replace old fixtures with new updated 4' bulbs. The new ballasts are TINY. According too their calculations, I'll save a ton of electricity and the fixtures will pay for themselves over the next couple of years. A friend with a car repair shop told one of my guys today that his electric bill went down about $100.00 to $125.00 a month after participating in this program ... Not only that, the light is fantastic. It's warmer, brighter, and more even than any florescent lights I have ever experienced. Working with Efficiency Vermont, I will receive a substantial rebate check to help with the installation cost after they come to check on my 53 new fixtures .... This is a great deal and they also have programs for public buildings and homes ... Our firehouse just got all new LED flood lights and will be upgrading their florescent s soon at pretty much zero cost to the taxpayers ...
Out with the old, in with the new ...
upstairs, downstairs, finish building, metalshop ...

Wednesday, January 12, 2011

Retinal Cryoplexy ...

Click the above to read the gory details ... 'irritated tissue', I guess ...

Last Thursday, for the second time in 7 years, I was diagnosed with a detached retina. I had two episodes back in 2003, and it was, again, in the same eye. I had eye surgery yesterday, (Retinal Cryoplexy, FYI), and it went well. It's an astonishing technology .. The surgeon first examined every corner of my eye with a lens thing and a million watt light, which was no picnic in itself. Then he took a little (+/- 1/8th” diameter) probe with a tube that he snaked in behind my eyeball, pushed a pedal, circulated some liquid nitrous oxide through the probe, and froze the s*** out of the back of my eyeball, creating an instant excruciating ice cream headache ... Then he did it again ... Today, right now, 28 hours later, I feel and see normally again. No pain.... This technique could easily eliminate any need for waterboarding, ever. I would have told him ANYTHING if he had threatened to do it a third time. Appropriately, Kit made some sockeye salmon for dinner when we got back home ... All’s well that ends well, but don't try this at home ...