ok .. we're getting close now ... as i wrote back on
july 28th, there's a lot going on in the shop. for the last week or so though, trevor and will and i have been pulling the final pieces of the pool table together. pool tables are always a challenge because, typically, we haven't built one for a while. our last one was in 2008 ... holy cow, no wonder we couldn't remember what we were doing exactly, and they are all different ... we're wrapping this one up, and, wonder of wonders, we'll be starting another one in a couple of weeks. hopefully that one will be a breeze. .. click the photos to enlarge them ...
like most things here,
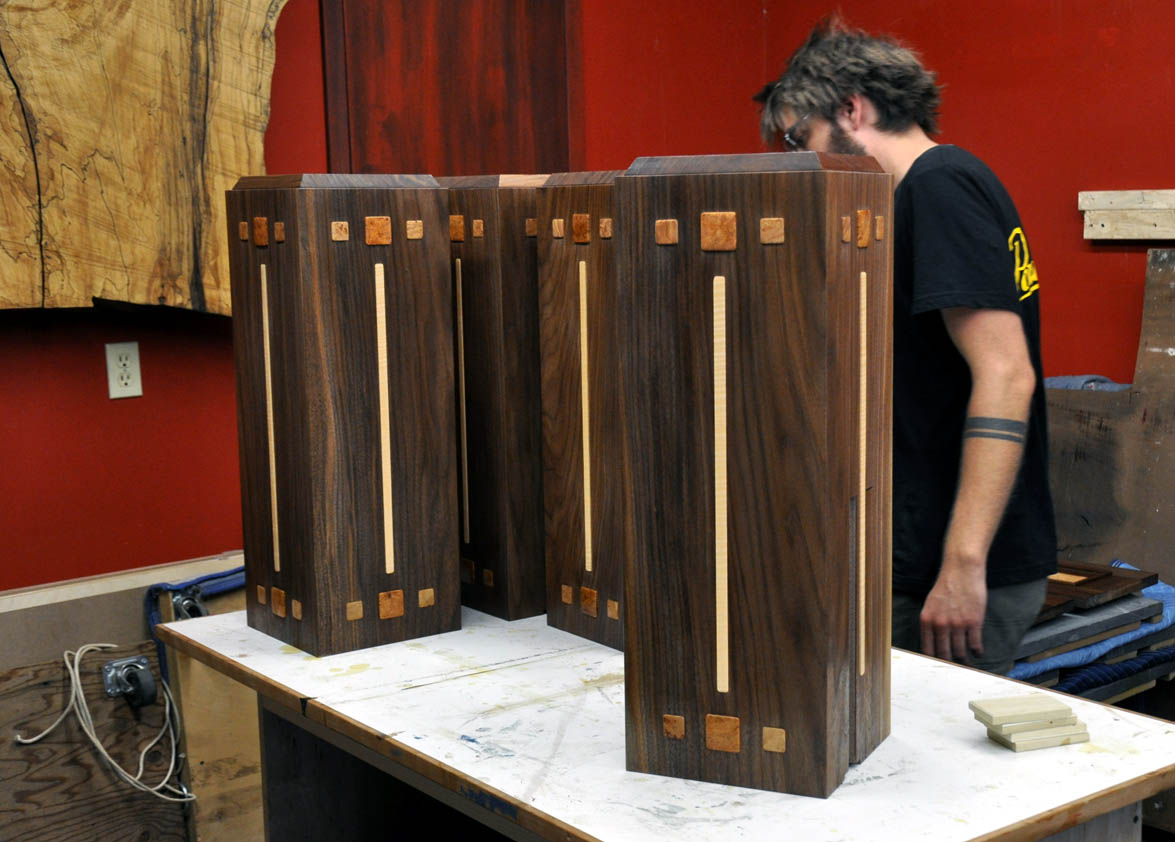
'we took something' and 'did something to it'.natural
irion walnut and quilted big leaf maple
what we 'took' was the pool table below, dropped the tapered legs, changed the inlays from 'baseball inspired' to geometric and had at it. the proportions, moldings and palette are pretty much the same, but the result will be different ...

the one above we built in 2003, so no one working with me now was working with me then. but fortunately, that table is local and, coincidentally, the client requested that we 'level it up' as it was exhibiting a slight roll to one corner. after studying the roll, (it took 3 or 4 racks), we determined that the one corner was in the dead center of a +/- 30 clear span and either the thick carpet there had crushed or the joist had sagged ever so slightly. a piece of 1/16th inch veneer and two playing cards under one leg and we were back to level. it was a bonus, as we got to check it all out and 'remember' how to build it.
like anything, you start with a bunch of parts. i never counted them, but trust me, there were a bunch ... our trusty companion is still, after 23 years of
pool table making, (15 tables total) an article by paul bowman that first appeared in fine woodworking in 1989 ...
i give you the link here. paul's table was different than most of ours, but the information applies (still) and if you study it, i think it's all in there somewhere.
we typically start with a leg mockup ...
and in this case, we made the mortises for the inlays and the inlays for the 16 leg pieces, but held off on gluing the inlays in until we were ready to do the finishing ...
our assembly system is a hybrid system of bolts and steel plates and captured nuts, (like for bed bolts), and i really need to document that for the future .. trevor's got it dialed in now so as long as he's around, i'm good to go.
i have documented the 'rail process' a series of steps below that define the playing area (44 x 88 in this case), and make the balls behave and the pockets the right size.
the rails are constructed in two pieces ... i've got a very detailed cad drawing with dimensions and angles and i'll post it here at some point ... the steel plates you see in the poplar above are for the rail bolts that come up through the holes you see in the slate below and lock the cushions firmly in place so the balls bank properly.
after we add the profiled rails to the polar subrails, we cut them to length using standard dimensions for each size playing area.
first we install the inlays, spaced in all cases at 1/8th (long rails) or 1/4 (end rails), of the playing area. in this case 11" starting out from the center of the side pocket and the middle of the end rails.
then we add the rubber using yellow glue and masking tape with the goal of having the point of the cushion one and 13/32nds (1.40something) of an inch above the surface of the felt so that they are not too high ... (ball does not rebound with life and kind of thuds) .. or too low ... (ball rockets off the table when struck too hard). .. a vitally important detail ...
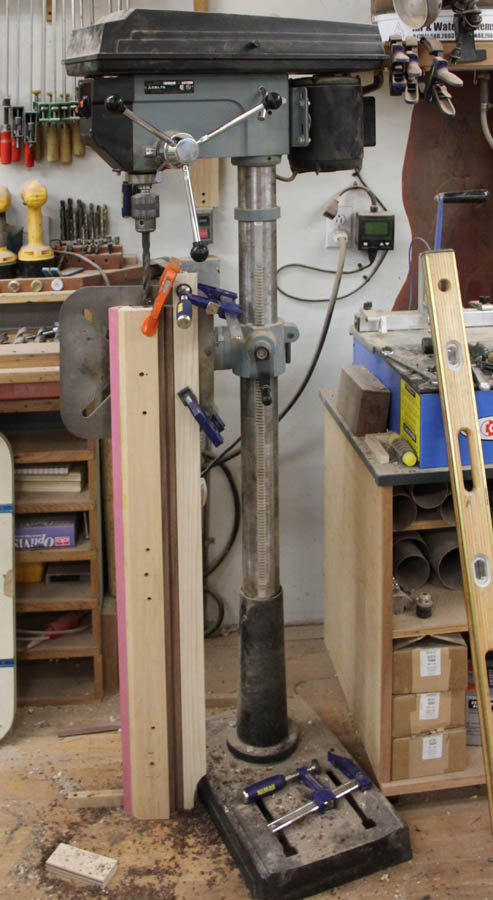
then you have to figure out how to drill the holes for the pockets .. we do em like this, except on a full size table where we have to raise the drill press up on a platform.
then you have to drill for the bolts that hold the pockets in place ...
then you get to put it all together and bolt it all to the slate and mark out the pocket angles ...
above, i give you the keys to the kingdom ... the order in which to do all this stuff. this is my 3rd and hopefully final iteration of this list.
after marking the angles using the standard measurements and angles from paul's article and a couple of jigs we have made, we cut them on our chopsaw, all on compound, fussy angles. the ends of the rubber than get different rubber cushion 'facings' and then the felt is applied ... we'll cover that when we get to it ... soon
update 8/22
i still haven't posted the felting of the rail details, but i hope to get to that tomorrow or maybe over the weeked. the table is finished now and it will be leaving for virginia next week on tuesday

we set it up for a final check yesterday, using a piece of blue felt left over from another project. i only wanted to stretch the real camel piece once, when the table is set up for real ... plays great and i'm happy with the new design.


 the one above we built in 2003, so no one working with me now was working with me then. but fortunately, that table is local and, coincidentally, the client requested that we 'level it up' as it was exhibiting a slight roll to one corner. after studying the roll, (it took 3 or 4 racks), we determined that the one corner was in the dead center of a +/- 30 clear span and either the thick carpet there had crushed or the joist had sagged ever so slightly. a piece of 1/16th inch veneer and two playing cards under one leg and we were back to level. it was a bonus, as we got to check it all out and 'remember' how to build it.


2 comments:
The output was great. Kudos to your creativity and hard work.
Nice post! I’ve been following this blog for a while, and I must say, the information shared here is always helpful. Keep up the amazing work! Best BIM Consulting Services in USA
Post a Comment